Aura Nails Step-by-Step Guide for a Mystical Manicure
Contents
hide
Introduction to Aura Nails
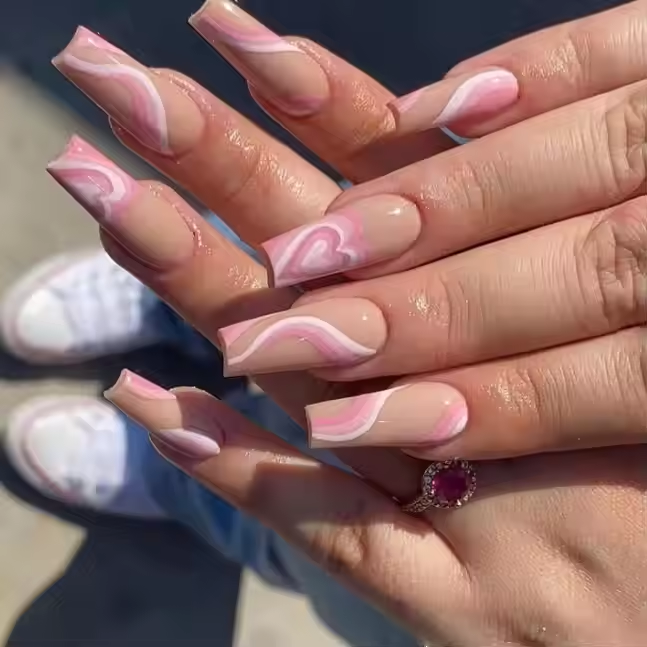
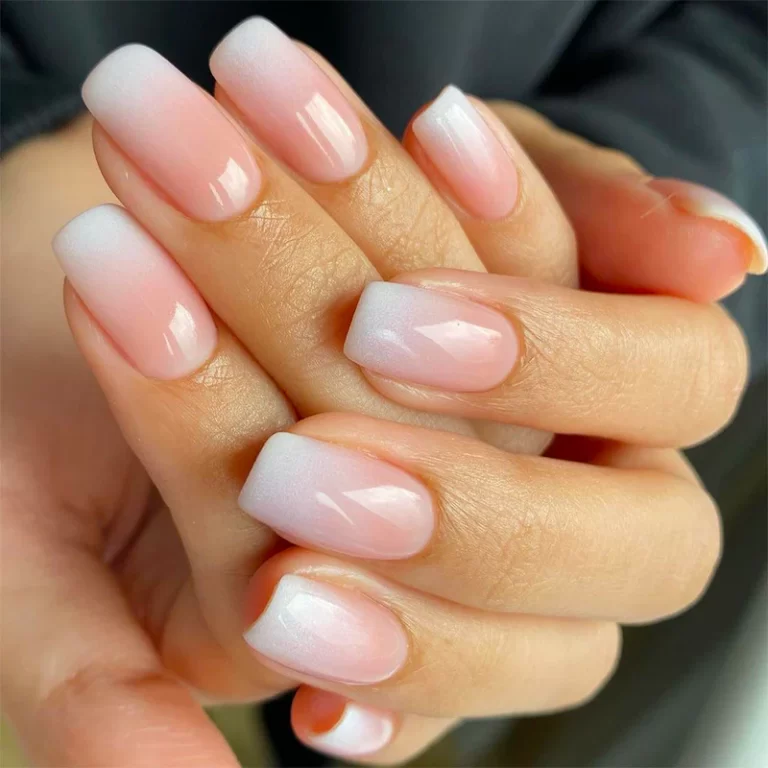
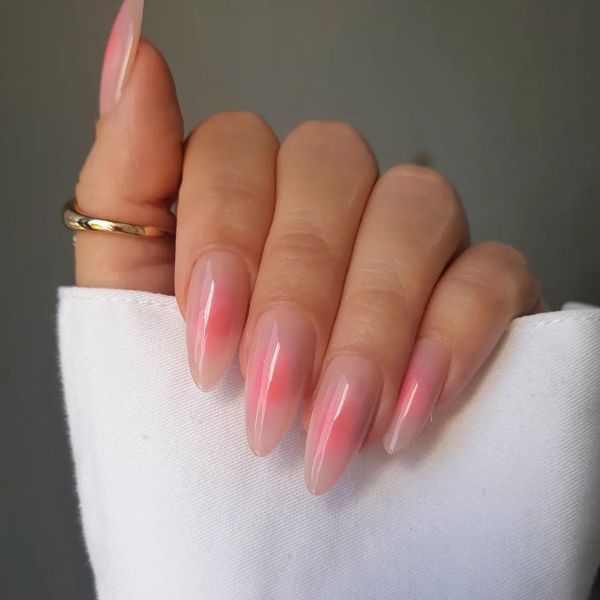
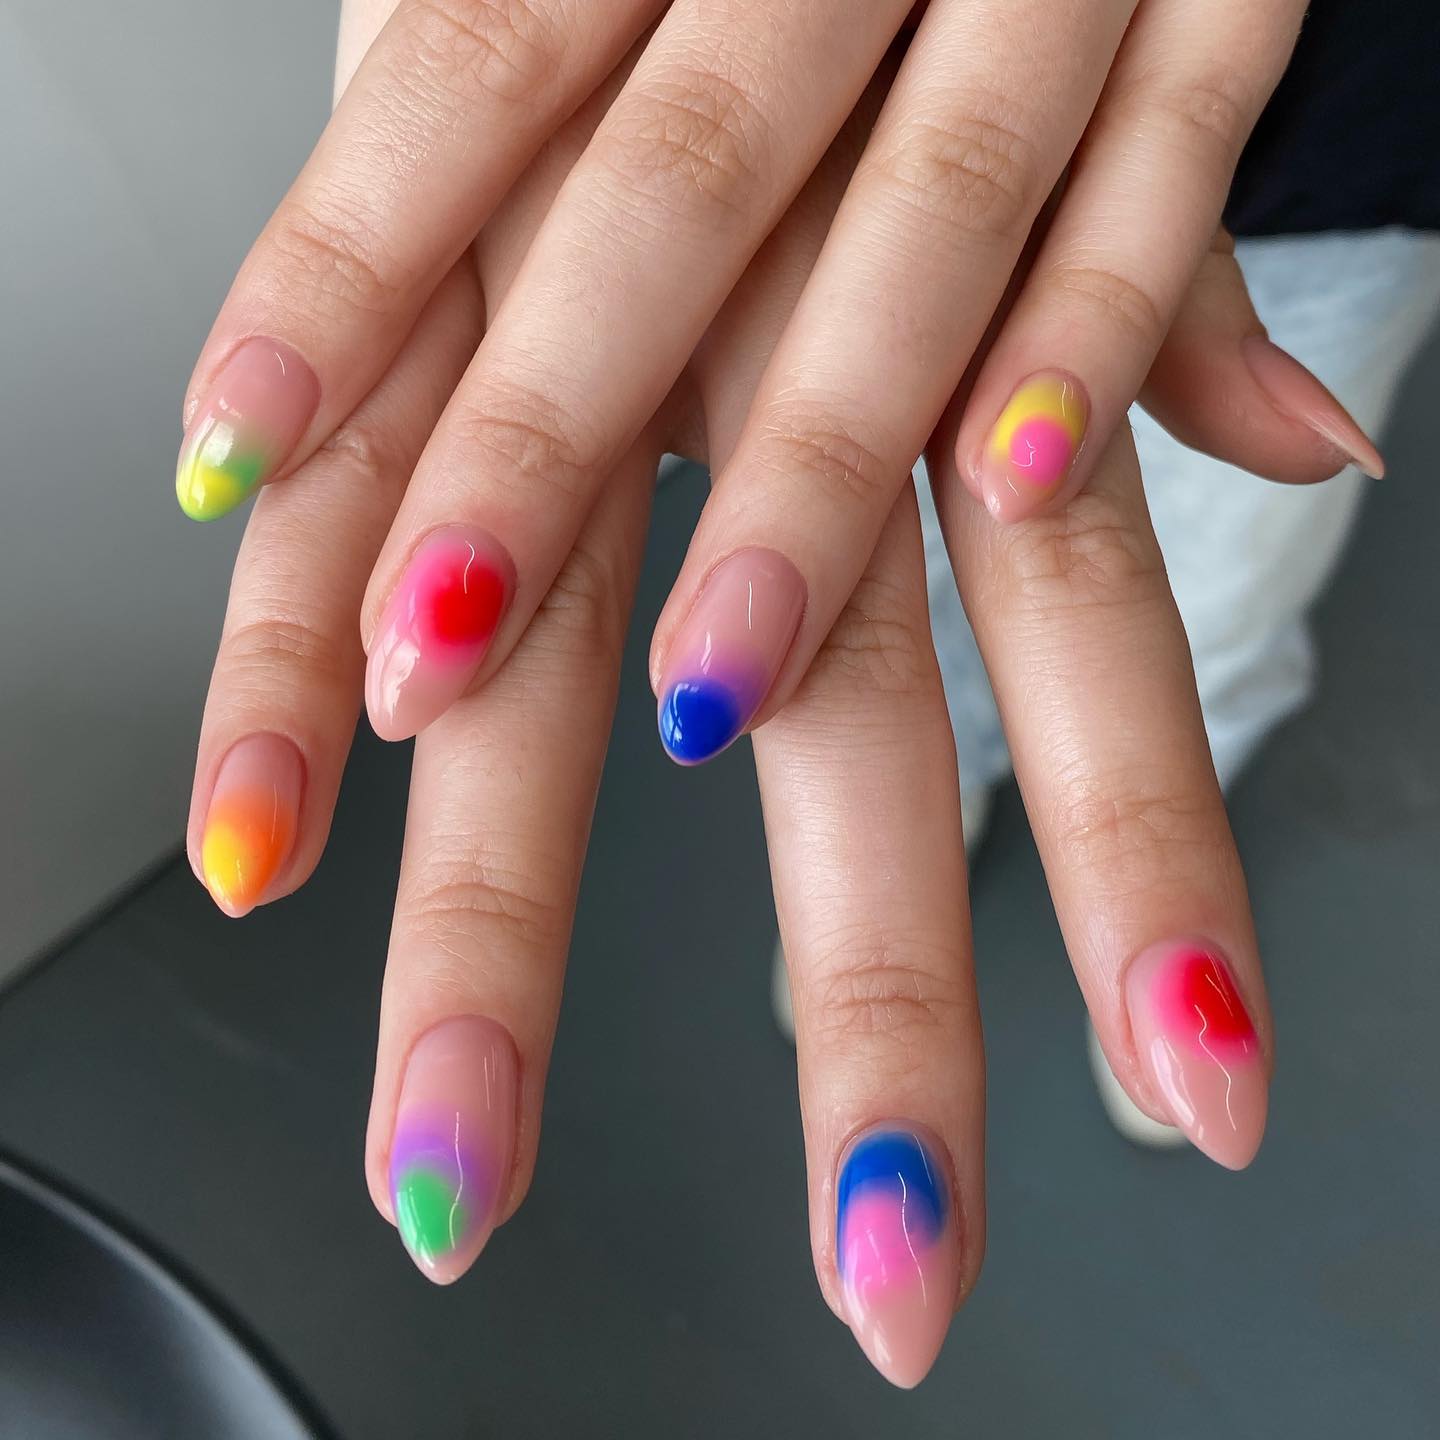
Aura nails capture attention with their glowing charm. These nails exhibit a radiant gradient effect, similar to an energy field. Their appeal lies in the seamless blend of colors. This creates a soft ombre look.
Concept and Popularity
Aura nails draw inspiration from ‘auras’, which are believed to be colored energy fields. These fields are thought to surround people and objects, reflecting their energies. This concept has been transferred onto nails to create a dreamy manicure. The trend’s popularity has skyrocketed. Why? Because of its easy application and its captivating finish. Nail enthusiasts and beginners alike can get behind this trend.
A-list Celebrity Examples
The aura nail design isn’t just a favorite among DIY beauty fans. It has adorned the fingertips of famous stars. Megan Fox and other A-list celebrities have showcased their aura nails. This increased visibility has driven the trend’s popularity even further. Celebrities help to introduce these mystical manicures to wider audiences. Consequently, many seek to emulate the style of their favorite stars.
Essential Tools for Aura Nails
To master the aura nail design, you’ll need a few essential tools. Gather these items before starting, and you’re set for success.
Selecting the Right Nail Polishes
Your nail polishes are the stars of the show. Choose colors that blend well for that ethereal aura effect. Typically, a sheer or pale base with vibrant colors for the gradient works best. Think of colors that emit energy and warmth.
Brushes and Sponges
Brushes and sponges are vital for blending your polishes seamlessly. Opt for a small, dense sponge for stippling color. A fine brush can help with detailed work like star accents. An ombre brush may be useful for those soft transitions.
Nail Care Basics
You can’t ignore the basics. A good nail file, cuticle pusher, and base coat are essential. These tools help shape your nails and prepare them for the aura application. A solid base is crucial for the aura effect to take hold and last.
Preparing Your Nails for the Aura Effect
Before diving into the enchanting world of aura nails, proper preparation is key. Ensuring your nails are prepped will set the stage for a stunning outcome.
Nail Shaping and Cleanup
Initiate the process by shaping your nails to your desired form. Rounded edges are currently popular, but feel free to opt for a square or almond shape if that suits your style. Next, focus on cuticle care. Gently push back your cuticles with a cuticle pusher, and clean up any excess around the nail bed. A clean nail surface is crucial for the paint to adhere well and last. This step contributes significantly to the manicure’s final appearance.
Applying Base Coat
Once your nails are shaped and cleaned, apply a base coat. A thin, even layer will do the trick. The base coat acts as a protective barrier for your nails, and also ensures that the subsequent layers of polish grip better. It’s important to let this coat dry completely before moving on. Patience here prevents smudges and ensures a smoother application of the gradient colors in the next steps. With your base coat settled, you’re all set to begin creating your alluring aura base.
Creating the Aura Base
Creating a stunning aura base is central to the mystical manicure. It’s like the canvas for your artwork, setting the stage for the aura nail’s glowing effect.
Choosing Your Base Color
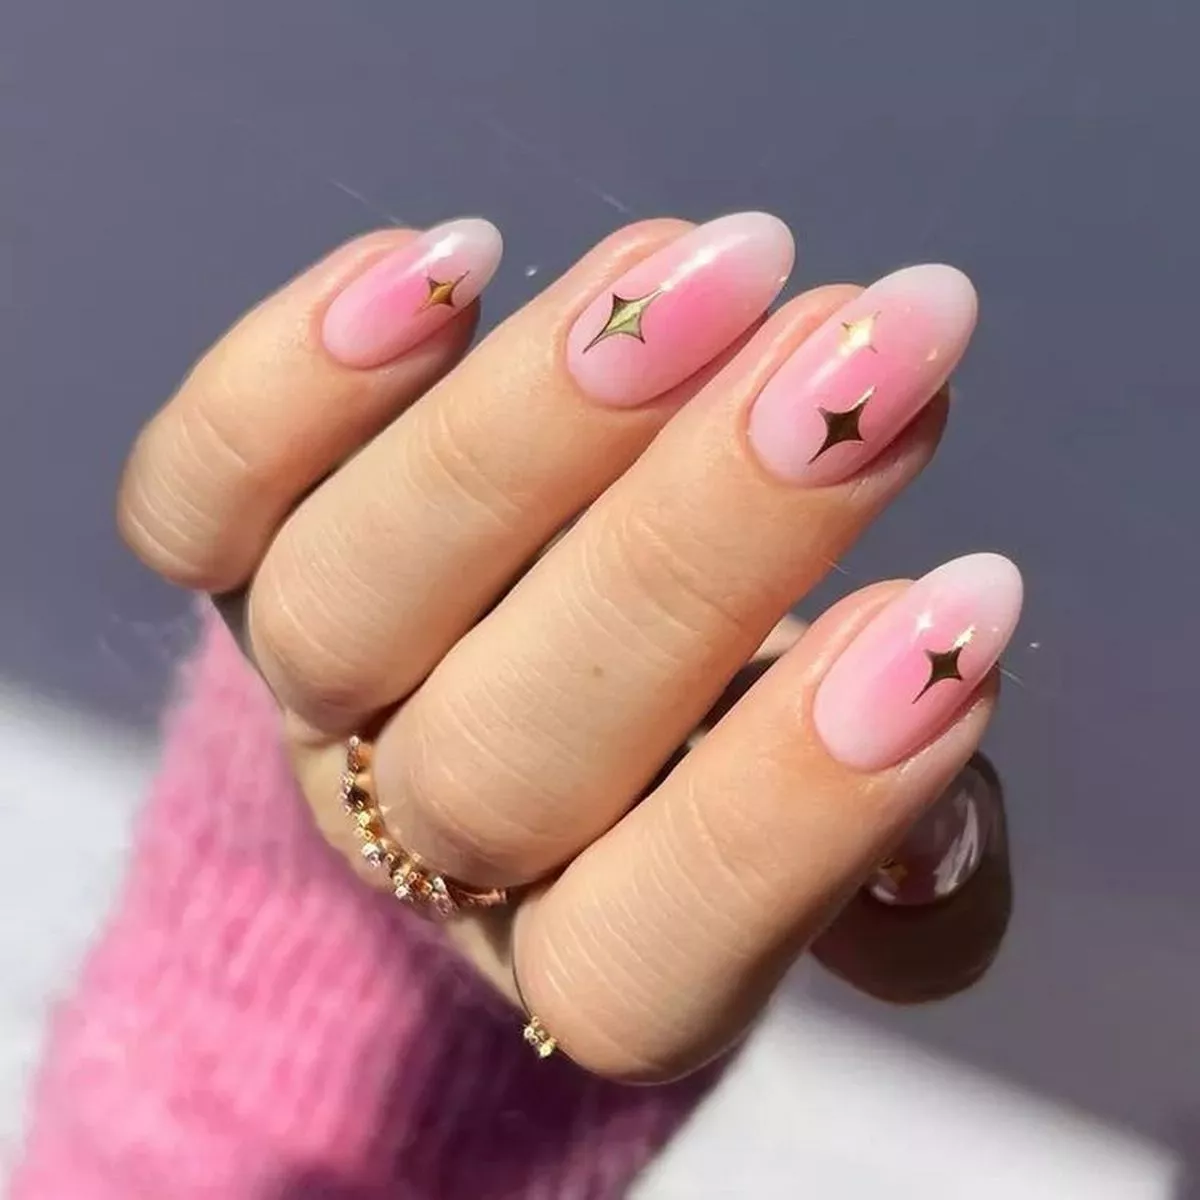
Select a sheer or light-colored polish as your starting point. Think of a color that replicates the lightness of an aura, such as a soft pink or a subtle nude. This shade will help accentuate the brighter colors applied later. Ensure the base color complements your skin tone for the most natural look.
Applying the Gradient Effect
The gradient effect is what gives aura nails their dreamy transition of hues. To start, place a small dot of your chosen vibrant color in the center of the base-coated nail. Use a sponge for a softer spread of color, gently dabbing outwards to create a diffused look. Play with different colors, like pink or purple, for various aura effects.
Remember to blend each layer before adding another to avoid harsh lines. Add as many gradient layers as you need to achieve the desired intensity. Just let each layer dry to perfection before adding the next. This method enhances the nail’s natural curve and gives the impression of a flowing aura.
Adding Depth to Aura Nails
To create a multidimensional look, layering colors is essential. This gives your aura nails depth and intrigue.
Layering Colors for Dimension
Choose extra colors to add over your base shade. Start with a lighter spectrum color. Dab this gently around the center. Add a darker shade to give a shadow effect. As you proceed, use lighter touches with your sponge. This keeps edges soft and blendable. Aim for a light to dark gradient. This mirrors natural auras’ varied intensities.
Blending Techniques for a Seamless Ombre
For a flawless ombre, you need to blend well. Use a clean sponge to dab a second color. Start from the middle and work outwards. Don’t rush; let each layer dry first. Use a fine brush to soften the edges. Your goal is a misty, faded look. This turns a flat color into a lively, flowing blend.
Finishing Touches for a Perfect Aura Manicure
After crafting the base and building depth with gradient colors, final details enhance your aura nails.
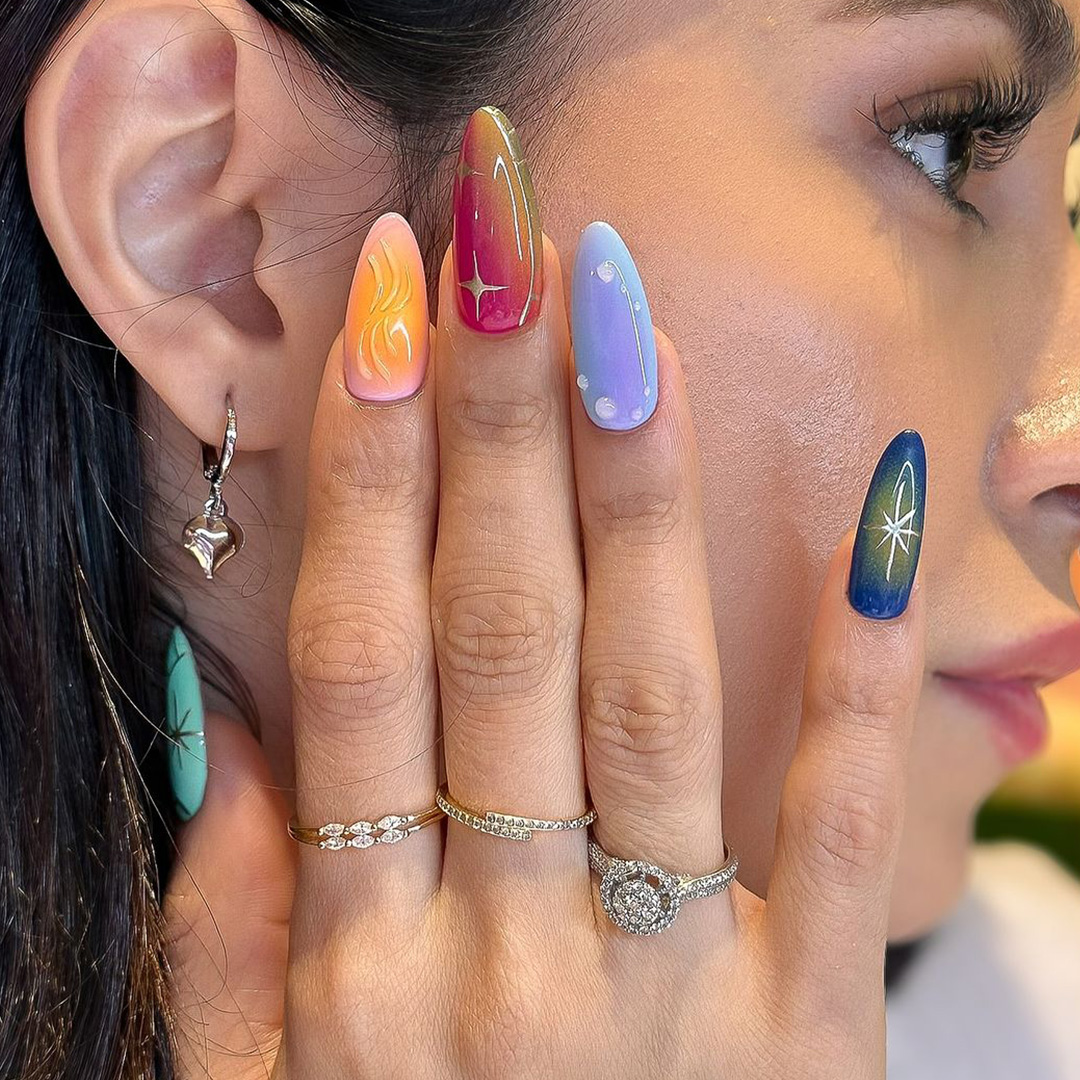
Applying Star Accents
Adding star designs can elevate the mystical allure of your aura manicure. Select a white polish for clear contrast. Draw two tiny stars on both the index and ring fingers. Use a fine nail art brush for precision. Place stars near the gradient’s edge for a sparkling touch. These accents bring focus to the radiant effect of the nails.
Top Coat Application for Longevity and Shine
A top coat seals your manicure and boosts durability. Choose a top coat for your desired finish, glossy or matte. Apply it evenly over the nail. Ensure complete coverage to lock in the aura design. The top coat also smooths any texture created during the gradient process. Allow the top coat to dry thoroughly. This will prevent chips and extend the life of your manicure. For extra shine, consider a high-shine topcoat option. It reflects light beautifully, making your gradient look even more vibrant. With the top coat set, your aura nails are complete and ready to mesmerize.
Maintaining and Caring for Your Aura Nails
To keep your mystical manicure looking fresh, follow these maintenance tips. Proper care will ensure longer-lasting wear and keep your aura nails dazzling.
Tips for Long-lasting Wear
- Avoid Water and Heat: Keep your manicure away from long soaks. Too much water can cause the polish to lift. Heat can also weaken the adhesion of your nail polish.
- Glove Up for Chores: When cleaning or doing dishes, wear gloves. This protects your nails from harsh chemicals and physical damage.
- Moisturize Regularly: Apply cuticle oil and hand lotion often. Moisturized nails and skin can help prevent chipping. It also keeps your hands looking great.
- Touch-Ups: If you notice any wear, apply a thin layer of top coat. This can extend the life of your manicure and maintain shine.
- Be Gentle: Treat your nails with care. Avoid actions that apply direct force to your nails. This helps prevent breaks and chips.
Safe Removal of Aura Nail Design
When you’re ready to change your nail design, it’s important to remove the aura nails safely. Here’s how:
- Soften the polish: Use a cotton ball soaked in acetone. Place it on your nails and wrap with aluminum foil. Wait a few minutes.
- Gently Scrape Away: Use a cuticle pusher to ease the polish off. Start from the base and push forward gently. Avoid scraping too hard to prevent damage.
- Oil and Hydrate: After removing the polish, your nails might be dry. Apply cuticle oil and hand cream immediately for recovery.
- Give Your Nails a Break: Before your next manicure, let your nails rest. This time allows them to regain their natural strength.
With these care and removal tips, your aura nails will stay stunning longer. And when it’s time for a new look, you can safely move on to your next nail adventure.
Conclusion: Mastering Aura Nails
Graceful and trendy, aura nails have taken the nail art world by storm. Vibrant colors and ethereal designs appeal to those looking to express individuality. Crafting this look requires a blend of creativity and technique. Following the steps outlined previously allows anyone to achieve stunning aura nails.
Final Tips for Success
To attain the best results, preparation is key. Start with clean, dry nails. A solid base coat is essential for both durability and color vibrancy. Additionally, layering colors effectively creates that sought-after aura effect. Transitioning from one color to another should be smooth to achieve a seamless finish.
Next, practice patience. Allow each layer to dry before applying the next to prevent smudging. This will enhance the overall look and longevity of the design. For those eager to experiment, various color combinations can yield unique results. Consider contrasting shades or trendy pastels for a modern twist.
Moreover, finishing touches elevate the design. A glossy top coat provides a sleek appearance while sealing in the artwork. Further embellishments, such as glitter or rhinestones, can add a touch of glam. Continue to explore different techniques and styles, as this art form remains versatile and open to creativity.
Lastly, don’t hesitate to share your aura nails with others. Social media is a fantastic platform to showcase artistry and inspire fellow nail enthusiasts. Feedback and encouragement can drive further creativity.