Create Stunning Marble Nails with KOKOIST Products
Contents
hide
Introduction to Marble Nails
Marble nails are a standout choice for those who love intricate, captivating nail designs. Mastering how to do marble nails can elevate your artistry and offer clients or yourself a splash of elegance. KOKOIST products provide the necessary tools and techniques to create stunning variations of marble nails. Whether you’re an experienced nail technician or a DIY enthusiast, marble nails are a technique worth learning for their beauty and distinctiveness.
Why Marble Nails are Timeless
Marble nails have stood the test of time due to their classic and sophisticated appearance. They mimic the natural swirls and patterns found in marble stone, bringing an element of luxury and art to nail design. The beauty lies in their versatility; no two marble nail art creations are the same, similar to actual marble. The style fits all seasons and occasions, making it an evergreen trend in the nail art world. With KOKOIST’s innovative products, achieving the seamless and organic look of marble on your nails is simpler and more enjoyable than ever.
Essentials for Crafting Marble Nails
Before you learn how to do marble nails, you need the right tools. Quality products help you achieve precise and eye-catching marble effects with ease. In this section, we’ll explore some essential KOKOIST items that are perfect for marble nail art.
Recommended KOKOIST Products
To create stunning marble nails, KOKOIST offers a variety of specialized products. These products are designed to work seamlessly together, providing the flexibility and control required for intricate marble designs. Here are some must-haves:
- Bleeding Inks: These alcohol inks are great for creating soft, flowing patterns. Their unique formula allows you to blend and achieve the signature marble look.
- Art Clear Gel: This multipurpose gel helps to smooth out color layers and create a marbling effect. It self-levels, making the process easier.
- Hazy Gel: Also known as a blooming gel, it lets color droplets spread, creating natural-looking dispersal similar to marble stone veins.
- Tap Brush: Specially designed for marble techniques, this brush helps tap product onto nails, allowing more creative control.
Choosing these recommended KOKOIST products will set you up for success. Each tool and product brings something unique to the table, allowing you to experiment with different marble nail art techniques. Next, we will delve into the various techniques you can use to achieve spectacular marble nails using these products.
Marble Nail Art Technique #1
To kickstart your marble nail art journey, let’s dive into the first technique using KOKOIST Bleeding Inks. These inks are perfect for creating mesmerizing, fluid patterns that resemble natural marble.
Creating Marble Effect with Bleeding Inks
Bleeding Inks are the go-to for a marble effect that looks like it’s effortlessly flowing across the nail bed. Here’s a simple guide to achieve this look:
- Begin with a base layer using KOKOIST color gels, like a blend of ‘Beige Pebble’ and ‘Strawberry Latte’ for a soft pink marble. Apply in broad, sweeping strokes.
- After curing the base, add a few drops of KOKOIST White Alcohol Ink onto the nail. Let it spread and marble naturally, without overworking it.
- Encourage the colors to blend by lightly dragging a brush through the ink. Cure again to set the design.
- Balance the pattern with another layer of color gel and additional white ink to add depth. Cure for the final time.
- Secure your artwork with a top coat, ensuring it cures fully for long-lasting beauty.
By following these steps, you can create a stunning marble design with depth and movement. The beauty of working with Bleeding Inks lies in the freedom to play with forms and translucency, crafting a unique piece of nail art every time.
Marble Nail Art Technique #2
For our second technique, we use KOKOIST Art Clear Gel to attain marbling. This technique capitalizes on the gel’s self-leveling properties. It creates a marbled texture without much hands-on manipulation.
Using Art Clear Gel for Marbling
The key to success with Art Clear Gel is its ability to self-level and smooth out other colors. Here’s a step-by-step method using Art Clear Gel:
- Begin by applying your choice of base color. White often works well to highlight your marble colors.
- Apply a layer of Art Clear Gel to the base. Its self-leveling feature will assist in achieving the marble effect.
- Add drops of your chosen KOKOIST color gels. Options like Sedona Turquoise and Santa Fe Turquoise give an earthy look.
- Do not cure immediately. Let the colors sit and use your brush to delicately marble them together. ‘Floating’ is essential here – don’t blend, just guide.
- Introduce small amounts of contrasting colors such as Bourbon Brown.
- For additional depth, layer white or black gels and continue the ‘floating’ process.
- Flash cure the design for a few seconds before a full cure to lock in the marbled pattern.
- Finish with a thorough application of a top coat and cure it to seal your art.
Remember, when using Art Clear Gel, less is more. Small droplets and gentle manipulation can create an incredible marble effect. Restraint is vital to let Art Clear Gel work its magic in creating a seamless marble design.
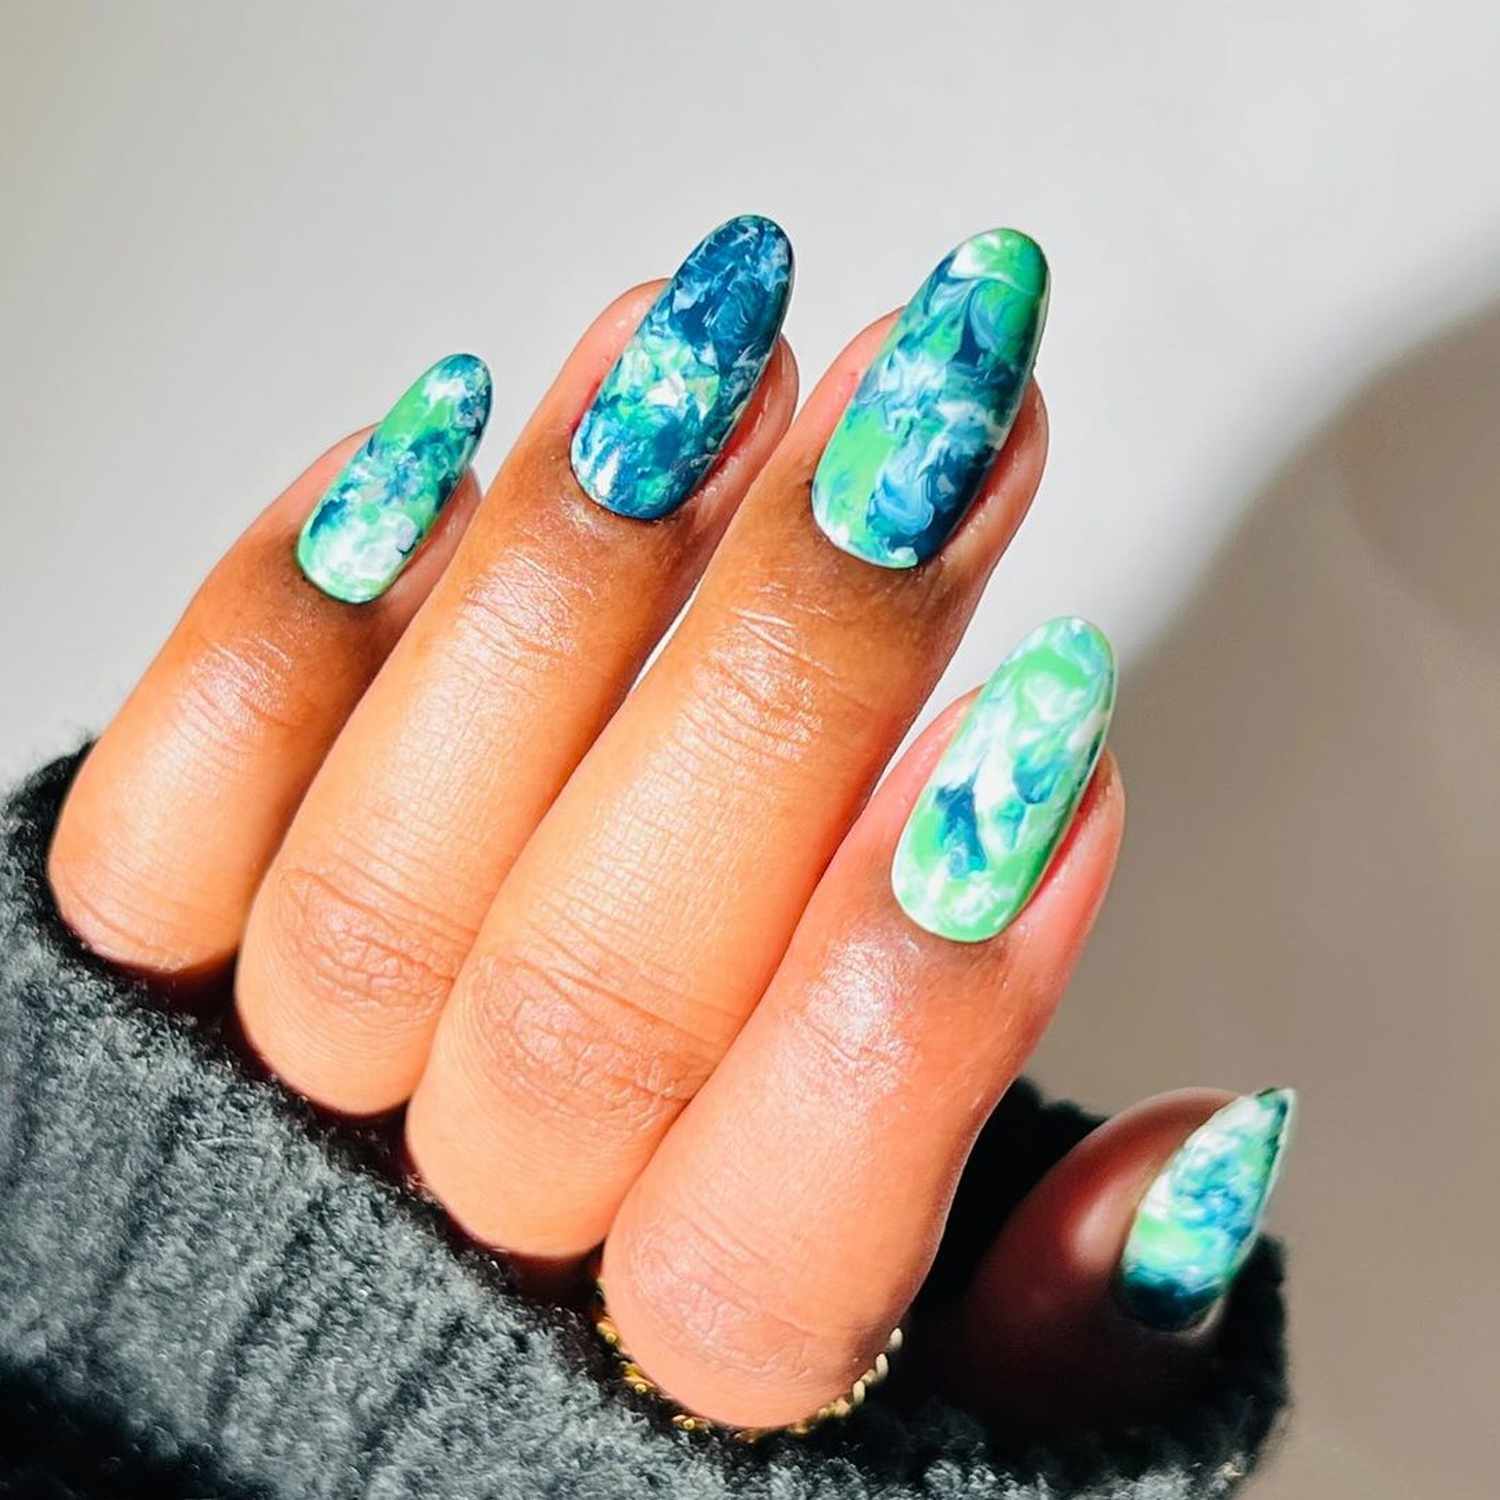
Marble Nail Art Technique #3
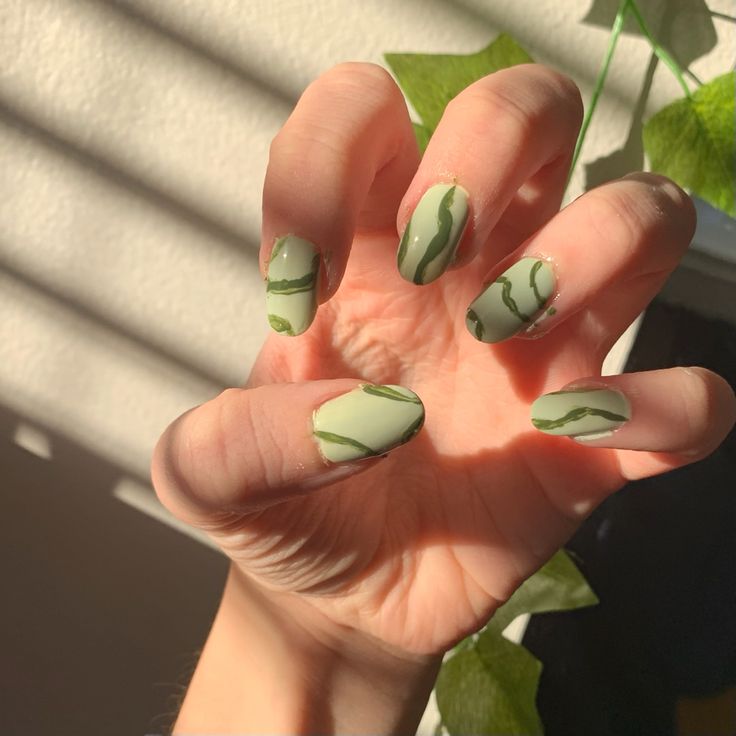
Moving onto the third technique for creating marble nails, we harness the unique properties of KOKOIST’s Hazy Gel. This gel is also referred to as blooming gel, which is crucial in achieving dispersed, organic-looking patterns that closely resemble the veins of natural marble stone.
Achieving Blooms with Hazy Gel
To capture the essence of exquisite marble patterns, KOKOIST’s Hazy Gel presents an innovative approach:
- Start with a clear base of Hazy Gel on the entire nail without curing it just yet.
- Add a small amount of Hazy White Gel to the center, where you want to see more spread and bloom.
- Paint with KOKOIST colors like Viola Purple Glass, but remember to wipe excess off your brush. You want gentle merging, not heavy blending.
- Gently layer in some Lavender Petals, allowing it to float and expand on the Hazy Gel base.
- If the design looks darker than desired, introduce Gradient White to soften it.
- For added depth, dot in Licorice Jelly Beans, enhancing the marble effect.
- Add lines with more Hazy Clear Gel if you desire more movement within the design.
- Cure the design then apply a base gel such as Mega Stick Base to level it out before the final cure.
- To make the design stand out, finish with a matte top coat and cure for the required time.
Each addition of color and gel takes your nail art to new heights, creating that desirable marble effect effortlessly. With KOKOIST’s Hazy Gel, the process is not only simple but also offers ample room for creativity and subtlety in achieving the perfect marble bloom.
Marble Nail Art Technique #4
For the fourth technique, let’s explore using KOKOIST’s Tap Brush. This tool helps create stunning designs.
Marbling with KOKOIST’s Tap Brush
The Tap Brush by KOKOIST is a firm tool for tapping color onto nails. Here’s how you use it for marbling:
- Start with a white base coat for the best color display.
- Apply small amounts of KOKOIST color gels on a palette.
- Use the Tap Brush to press and spread the color on the nail. Aim for random, happy shapes.
- Clean the Tap Brush with alcohol between colors.
- Layer more colors like yellow and tap again across the nail.
- Add a hint of gold and repeat with the blue for vibrant touches.
- Flash cure the design between applications to prevent running.
- Apply white in areas to separate colors if needed.
- Cure the final design for 30 seconds before applying a top coat.
The result is a beautifully marbled nail with a dynamic flow. The Tap Brush gives you the freedom to mix colors artistically.
Tips for Perfecting Your Marble Nail Art
Creating marble nails is an art form, but with a few tips, you can master it with confidence. Here’s what to keep in mind to perfect your marble nail art techniques using KOKOIST products.
Avoiding Common Mistakes
Marble nails look stunning when done right, but certain missteps can affect the end result. Here are some common mistakes to steer clear of:
- Overworking the Design: Marble is about effortless flow. Work too much, and it becomes a muddle. Apply ink or gel, then let it set without too much fuss.
- Using Too Much Product: More isn’t always better. A lot of ink or gel can make nails look heavy. Use small amounts and build gradually for a natural effect.
- Not Curing Properly: Rushing the curing step can ruin the design. Cure each layer fully before adding more.
- Forgetting to Clean the Brush: Always clean your brush between colors. This prevents unwanted blending and keeps patterns sharp and clear.
- Ignoring the Base Color: A good base can make colors pop. Usually, white works best. Make sure it’s even and fully cured before starting the marble effect.
Keep these tips in mind when you do marble nails. They will help ensure a clean, elegant finish every time. Good technique makes the design last longer and look its best. Remember, practice makes perfect, so don’t be afraid to experiment with KOKOIST’s range of products!
Sealing Your Marble Nail Art
To ensure your marble nail art remains stunning, sealing it properly is crucial. It’s the final, protective layer that guards against chips and wear.
Choosing the Right Top Coat
Selecting the correct top coat is key for a flawless finish. Here are some tips:
- Use Non-Wipe Top Coats: These add shine without extra cleaning steps. They’re quick and convenient.
- Consider Matte Finishes: A matte top coat can highlight marble details uniquely. It gives a sophisticated touch.
- Check Compatibility: Ensure the top coat works well with the inks and gels used. KOKOIST top coats are formulated for their products.
- Apply Evenly: Cover every part of the nail, capping the free edge. This helps prevent lifting and prolongs wear.
By selecting a top coat that complements your marble design and applying it correctly, your manicure will stay beautiful for longer. Remember, practice makes perfect. Each time you do marble nails, you’ll get better at crafting and sealing your creations. Keep refining your technique and enjoy the stunning results!